Programing your Wireless Keypad
Just like our garage doors and openers, our support is the best in the business. Some say that our support puts the “genuine” in our motto, “The Genuine. The Original.” because we truly care abo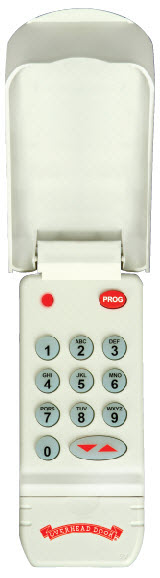 ut our customers and do what it takes to make sure you are satisfied with your Overhead Door product(s).
Accessing garage door opener and accessory support is easy. For your convenience, we have included below easy-to-understand, step-by-step instructions for programming garage door openers and accessories.
Programming CodeDodger® Wireless Keypads
Download PDF instructions of CodeDodger®: English Spanish French
Testing Garage Door Opener
1. Enter your personal identification number (PIN).
2. Press the button with the arrow up/down triangles.
Resetting/Clearing Keypad
1. Press and hold the PROG button. Keep holding and proceed to step two.
2. Press and hold the 6 button. Keep holding and proceed to step three.
3. Press the key with the arrow up/down triangles.
Setting PIN on Keypad
1. Press the following keys in order: 3, 5, 7, PROG (red LED blinks once per second).
2. Enter your PIN (three to eight characters).
3. Press the PROG key again (red LED blinks twice per second and turns off).
Programming Garage Door Opener
Before you begin, be aware of the following:
- For convenience, program your keypad before mounting.
- If programming your garage door opener is disrupted at any point due to program failure, clear/reset your keypad. Then, start over.
- Locate the “Learn Code” button and the “Learn Code” red LED indicator.
Programming One Garage Door Opener
1. Press the “Learn Code” button once (red LED indicator will blink).
2. Enter your PIN.
3. Press the button with the arrow up/down triangles. The “Learn Code” indicator LED will stay on.
4. Press the button with the arrow up/down triangles a second time. The “Learn Code” indicator LED will turn off.
5. Press the button with the arrow up/down triangles a third time. Garage door should now move.
Programming Two or Three Garage Door Openers
All garage door openers will use the same PIN.
Programming Garage Door Opener Keypad
1. Enter your PIN and press the PROG button (red LED blinks once per second).
2. Press the PROG button a second time (red LED blinks twice per second).
3. Press the total number of doors you wish to control (either 2 or 3).
4. Press the PROG button a third time (red LED blinks several times and turns off).
Programming Garage Door Opener
1. Decide which door will be Door 1, 2 and 3. “Learn Code” indicator LED (on opener) blinks.
2. Enter your PIN and press the arrow up/down triangle button. “Learn Code” indicator LED continues to blink.
3. Press the number you have picked for this door opener: 1, 2 or 3. “Learn Code” indicator LED stays on.
4. Press the arrow up/down triangle button a second time. “Learn Code” indicator LED turns off.
5. Press the arrow up/down triangle button a third time. Garage door should move.
6. Repeat steps one through five for programming each garage door opener. Each door opener must be programmed to receive the signal from the wireless keypad.
Troubleshooting Tips
• If the garage door does not move, check the red LED on the keypad.
• If the LED blinks rapidly, the PIN was entered incorrectly.
• Any keypad button will control the door for 30 seconds after the door starts moving.
• Rapid blinking of the LED indicates an error. After a few seconds, the LED will turn off, and you can retry.
• If the red LED does not blink during use, the battery needs to be changed.
Mounting Instructions
1. Remove the battery cover.
2. Drill a 1/16" hole for the top mounting screw.
3. Install a screw into the top drilled hole, leaving a 1/8" gap between the screw head and the wall.
4. Hook the keypad over the screw.
5. Mark the bottom hole, then screw in the bottom screw.
6. Reinstall the battery cover.